Lab #9, Friday October 26
The purpose of this lab is to introduce you some simple graphics in C++ using an OpenGL wrapper.
This lab is set up to run in Visual Studio. If you are adventurous you could compile and run in other environments but it will require downloading the libraries and configuring it for your environment.
Most of the work is just setting up and configuring Visual Studio. Here are instructions:
- Create a new Visual Studio project that is empty with no files. For purposes of this lab, consider the project to be named "Lab9".
- Download the file GL.zip to your desktop (or "My Documents" or "Downloads")
- Unzip the file. It will create a folder named "GL" with several files inside the folder.
- Copy the GL folder into your Visual Studio project folder. For example, with my project named Lab9, the path is:
C:\Users\Kenrick\source\repos\Lab9\Lab9 (Yes, Lab9 is there twice, once as the solution and again as the project)
This means that the unzipped files are now located in C:\Users\Kenrick\source\repos\Lab9\Lab9\GL
- Go into the "GL" folder and copy the files "Main.cpp" and "glut32.lib" (NOT "glut32lib" - show your file extensions to see which one) up one level. In my example they are copied to
C:\Users\Kenrick\source\repos\Lab9\Lab9
- Back in Visual Studio, click on the "Solution Explorer" and right-click on "Source Files" and select "Add, Existing Item". Select Main.cpp. It should now show up in the Solution Explorer and you can double-click to open it in the editor.
- In Visual Studio, under the "Build" menu, select "Build Solution". It should compile.
- Go into the "GL" folder and copy "glut32.dll" into the Debug folder. In my project this is located at
C:\Users\Kenrick\source\repos\Lab9\Debug
- Note that this is two levels up from where you put the GL folder. There should be a Lab9.EXE file in the debug folder. You should now be able to click on the green triangle to compile/run the program.
The good news is once you have made it through all nine steps you don't need to repeat them. If you are also working on a new project that uses OpenGL graphics then you can just copy the folder with the project into a new place (and possibly new name) and it should retain all the linkages from steps 1-9.
TO DO:
- Study the "display" function and experiment with the code until you are confident you understand how it works.
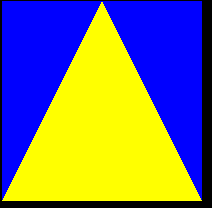
- Edit the display function so it draws a yellow triangle inside a blue square, e.g.:
Show your code/program to the instructor or lab assistant for credit, or email to kjmock@alaska.edu.